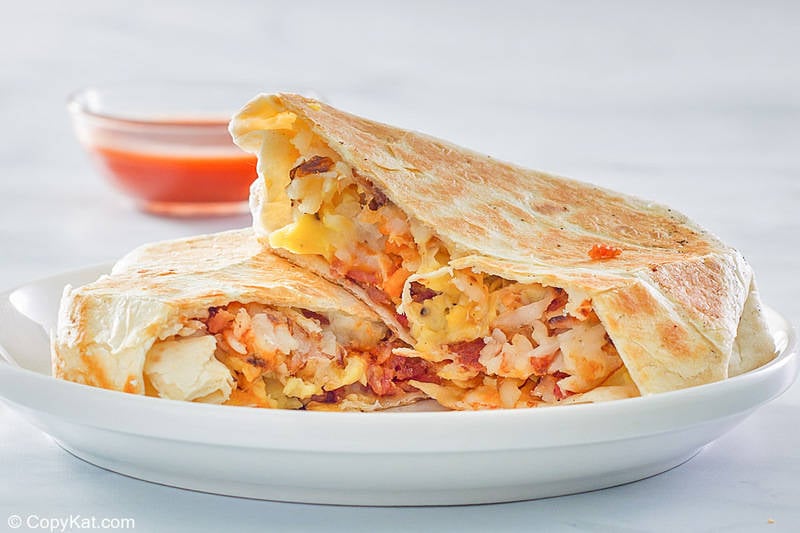
Imagine a breakfast so utterly satisfying, it transforms even the most rushed mornings into a culinary delight. Picture this: a perfectly golden, crispy tortilla giving way to a warm, hearty embrace of fluffy scrambled eggs, savory breakfast sausage, and a generous cascade of gooey, melty cheese. This isn't just breakfast; it's the ultimate Minute Breakfast Crunchwrap: Crispy, Cheesy & Perfect for On-the-Go experience. Forget your ordinary breakfast burrito; the breakfast crunchwrap is its sophisticated, crunchy cousin, ready to elevate your morning routine.
For those chaotic weekdays when you need something substantial but can't spare the time for a sit-down meal, or for a leisurely weekend treat that feels incredibly indulgent, the breakfast crunchwrap is your secret weapon. It’s completely handheld, offering a complete, delicious meal in every bite – no fork required. Once you experience that irresistible crunch and the savory explosion of flavors, you’ll understand why this homemade wonder becomes an instant obsession.
Why the Breakfast Crunchwrap Reigns Supreme in Your Morning Routine
What makes the breakfast crunchwrap so undeniably superior? It boils down to a perfect symphony of texture, taste, and convenience. It’s more than just a meal; it’s an experience that tackles all your breakfast desires in one perfectly wrapped package. Here’s why this breakfast crunchwrap recipe will undoubtedly steal your heart:
- The Ultimate Crunch Factor: That satisfying crackle as your teeth break through the golden, toasted tortilla and crunchy interior is pure bliss. It’s a texture sensation that stands out from soft burritos or soggy sandwiches.
- Melty, Cheesy Perfection: We’re talking about epic cheese pulls here! A thoughtful blend of cheeses ensures maximum meltiness and a rich flavor that binds all the delicious fillings together.
- Unrivaled Customizability: This isn't a one-size-fits-all meal. The breakfast crunchwrap is a canvas for your culinary creativity. Swap sausage for bacon, add a medley of your favorite veggies, or dial up the spice with jalapeños.
- Remarkably Quick & Easy: Despite its impressive appearance, this culinary marvel can be on your plate in about 20 minutes. It's often faster and definitely more satisfying than waiting in a drive-thru line.
- Perfectly Portable: Its clever folded design means no spills, no mess. It’s the ideal handheld breakfast for busy mornings, commutes, or even a delightful picnic in the park.
- Better Than Fast Food: While inspired by popular fast-food versions, a Homemade Breakfast Crunchwrap: Better Than Fast Food, Easily Customizable offers superior ingredients, fresher taste, and the satisfaction of knowing exactly what goes into your meal.
This isn't just about feeding your hunger; it's about treating yourself to a truly exceptional breakfast that’s both comforting and exciting. It's the ultimate answer to "what's for breakfast?"
Essential Ingredients for Your Ultimate Breakfast Crunchwrap
The beauty of a fantastic breakfast crunchwrap recipe lies in its simplicity and the ability to transform everyday ingredients into something extraordinary. While you can customize to your heart's content, here are the foundational elements for that quintessential crunchwrap experience:
The Core Components
- Large Flour Tortillas: You’ll need four large (10-12 inch) tortillas for the outer wrap and four smaller (6-8 inch) tortillas or corn tostada shells for the inner crunch. The large ones must be fresh and pliable to fold without cracking.
- Eggs: Four large eggs, ideally farm-fresh, will yield the fluffiest scramble. They are the hearty foundation of your breakfast.
- Breakfast Sausage: One cup of cooked and crumbled breakfast sausage provides that essential savory, meaty flavor. Ground turkey sausage is a great lighter alternative.
- Cheese Blend: A magical combination of 1 cup shredded cheddar for sharp flavor and ½ cup shredded mozzarella for that epic stretch and meltiness. Don't skimp on the cheese!
- Butter or Oil: 2 tablespoons of butter for cooking your eggs and crisping your crunchwrap adds incredible flavor. Oil works well too, especially if you're watching the heat.
Optional Add-Ins for Flavor & Texture
- Diced Bell Peppers: ½ cup of colorful bell peppers adds freshness and a hint of sweetness.
- Jalapeños: For those who love a kick, ½ cup of diced jalapeños (fresh or pickled) brings a welcome spice.
- Green Onions: 2 tablespoons of chopped green onions offer a fresh, mild oniony bite that brightens the whole wrap.
- Hash Browns or Tostada Shells: This is where the "crunch" truly comes into play. A crispy hash brown patty or a corn tostada shell pressed into the center adds an unbeatable textural contrast.
- Avocado or Guacamole: Creaminess and healthy fats for an extra layer of richness.
- Hot Sauce or Salsa: A drizzle of your favorite hot sauce or a dollop of fresh salsa can take your crunchwrap to the next level.
- Bacon: Crumbled crispy bacon is an excellent substitute or addition to the sausage.
- Veggies: Sautéed mushrooms, spinach, or onions can easily be incorporated for added nutrition and flavor.
Remember, the fresher your ingredients, the better your crunchwrap will taste. Investing in good quality tortillas that fold easily is a game-changer.
Mastering the Breakfast Crunchwrap Recipe: Step-by-Step Guide
Crafting the perfect breakfast crunchwrap is simpler than you might think, but a few key techniques will elevate yours from good to truly gourmet. Follow these steps for a flawless, crunchy, and cheesy breakfast.
Step 1: Prepare Your Flavorful Fillings
- Scramble the Eggs: In a non-stick skillet, melt 1 tablespoon of butter over medium-low heat. Crack in your eggs and scramble them gently. The trick for fluffy eggs is to cook them slowly and pull them off the heat when they are still slightly wet. They will continue to cook from residual heat, ensuring they aren't dry or rubbery. Season with a pinch of salt and pepper. Set aside.
- Cook the Sausage (if not pre-cooked): If using raw sausage, crumble it into the same skillet and cook over medium heat until browned and cooked through. Drain any excess grease. Set aside.
- Sauté Veggies (Optional): If adding bell peppers or jalapeños, quickly sauté them in the skillet for 2-3 minutes until slightly softened but still retaining a bit of crunch.
- Prepare Hash Browns (Optional): If using hash brown patties, cook them according to package directions until golden brown and crispy.
Step 2: Assemble the Crunchwrap Masterpiece
This is where the magic happens. A methodical layering approach ensures an even distribution of flavors and a sturdy wrap.
- Lay the Foundation: Lay a large flour tortilla flat on a clean surface.
- Cheese Base: Sprinkle a generous layer (about ¼ cup) of your shredded cheddar and mozzarella blend in the center of the large tortilla. This cheese layer acts as a barrier and helps prevent sogginess while adding incredible flavor.
- Add the Eggs & Meat: Spoon about ¼ of your scrambled eggs over the cheese. Follow with ¼ of the cooked sausage.
- Veggie Power (Optional): If using, add a layer of sautéed bell peppers, jalapeños, and a sprinkle of green onions.
- The Crunch Layer: Place a crispy hash brown patty or a small tostada shell directly over the filling. This is the secret to that signature crunch!
- More Cheese, Please!: Sprinkle another layer of cheese (about 2 tablespoons) over the hash brown/tostada. This helps glue the crunch layer to the inner tortilla.
- The Inner Seal: Place a smaller flour tortilla (or another tostada shell if you want double crunch) directly on top of the cheese layer. This smaller tortilla covers the filling and makes the folding process easier.
- Folding Technique: This is crucial for a tight seal. Starting from one edge, begin folding the large tortilla over the smaller inner tortilla, working your way around in a clockwise direction. Overlap each fold slightly, creating pleats until the entire filling is enclosed in a hexagonal shape. Press down gently to secure the folds. If the tortilla isn't pliable enough, warm it briefly in the microwave for 10-15 seconds.
Step 3: Achieving the Golden Crunch
The final step is to cook your assembled crunchwrap to golden perfection.
- Preheat Skillet: Heat your largest non-stick skillet or griddle over medium heat. Add the remaining 1 tablespoon of butter or a drizzle of oil.
- Cook Seam-Side Down: Carefully place the crunchwrap into the hot skillet, seam-side down. This helps seal the folds and prevents it from unraveling.
- Cook Until Golden: Cook for 3-5 minutes per side, or until the tortilla is deeply golden brown and beautifully crispy. Press down gently with a spatula to ensure even contact and browning. The cheese inside should be perfectly melted and gooey.
- Serve Immediately: Remove from the skillet, let it cool for a minute or two (the fillings will be hot!), slice it in half, and marvel at your creation. Serve with your favorite salsa or hot sauce.
Tips & Tricks for Crunchwrap Perfection
To truly master this breakfast crunchwrap recipe and ensure every bite is perfection, consider these expert tips:
- Prevent Cracks: If your large tortillas feel stiff, warm them slightly in the microwave for 10-15 seconds before folding. This makes them more pliable and less likely to crack.
- Don't Overfill: While tempting, too much filling can make folding difficult and lead to a messy crunchwrap. Aim for a generous but manageable amount.
- The Importance of the Inner Tortilla: Using a smaller inner tortilla (or a second tostada) is key. It creates a solid top layer for folding and prevents your outer tortilla from getting soggy from the filling.
- Cheese Placement Matters: Layering cheese both under and over your main fillings (especially the hash brown/tostada) acts as a delicious adhesive, holding everything together and creating more melt.
- Even Browning: Don't rush the cooking process. Medium heat ensures the tortilla gets crispy and golden without burning, allowing the cheese to fully melt inside. Pressing down gently with a spatula helps ensure even contact with the hot surface.
- Make Ahead Magic: You can prepare the fillings (scrambled eggs, cooked sausage, chopped veggies) ahead of time and store them in the refrigerator for up to 2-3 days. This significantly cuts down on prep time in the morning. Assemble and cook fresh.
- Batch Cooking & Freezing: For ultimate convenience, assemble and cook several crunchwraps. Let them cool completely, then wrap individually in parchment paper and then foil. Freeze for up to a month. Reheat in a preheated oven at 375°F (190°C) for 15-20 minutes, or in an air fryer for 8-12 minutes until heated through and crispy.
- Spice It Up: Don't hesitate to add a pinch of chili powder or smoked paprika to your eggs for extra depth of flavor. A dash of your favorite hot sauce is always a good idea!
- Sauce It Up: Serve with a side of creamy sriracha mayo, a zesty avocado crema, or classic salsa for dipping.
Conclusion
The breakfast crunchwrap isn't just a meal; it's a game-changer for anyone seeking a delicious, convenient, and utterly satisfying start to their day. With its irresistible combination of ultimate crunch, gooey melted cheese, and a hearty, customizable filling, this breakfast crunchwrap recipe quickly becomes a beloved staple. Whether you're a busy parent, a brunch enthusiast, or simply someone who appreciates good food, mastering this recipe will unlock a world of flavorful mornings. So grab your ingredients, embrace the joy of assembly, and prepare to bite into your new favorite breakfast obsession!
